Showing posts with label clothing. Show all posts
Friday, September 2, 2016
Monogram Pocket Nightgown
Friday, October 9, 2015
DIY Halloween Costume Ideas
My girls love Halloween and picking out their costumes every year. However, I'm not big on spending money on pre-made costumes from the store. Even growing up, we always put together a costume out of what we had rather than buying it. I think it's much more creative and fun to come up with an idea, rather than just buying something. My youngest did recycle one of our dance recital costumes to be a mermaid! Always nice to get a little more use out of these things since we spend so much $$$ on them!
Last year we all decided to dress up to go trick-or-treating. That meant I needed an outfit as well. I decided to go as Katniss Everdeen from the Huger Games! This wasn't too hard to come up with out of items from my closet. I had some green pants, a black tank, a green jacket and black boots. I found a gold pin that resembled hers at Goodwill for $.99. I also found a bow and arrow set at the Dollar Tree. It was a bright color so I simple spray painted it silver. For my quiver pouch, I made a long skinny bag out of black felt and attached a black purse strap to it. Make sure to braid your hair. Simple!
One of my daughter's wanted to go as Olaf from Frozen! I did buy her this Olaf hat at Target, but it's something she can wear throughout the winter, and not just on Halloween. We paired it with a brown long sleeve T for Olaf's stick arms. Top that with a white sleeveless shirt for his belly. I simply pinned on black felt circles to be his buttons. It is also pretty easy to make a tutu skirt. Sew or pin a circle of elastic to fit your waist. Next tie strips of tulle onto the elastic until you have filled it. Add a pair of white leggings and Olaf is ready to go!
My oldest daughter wanted to be a cowgirl. We pulled just about all of it out of her closet. She wore a plaid shirt over a tank along with her jeans. Top with a pair of boots and a cowgirl hat and you are just about ready to go! We found a bandanna for $1 at Walmart and added a rope lasso. You could carry your own rope if you have some in the garage, but I found hers for just a few bucks in the costume section. Ready to lasso some candy!
I'm all for buying Halloween costumes. However, I usuallly buy them after Halloween when they are 75% off! That way the girls can wear them for dress up all year long. Sometimes they will pick something out of their dress-up bin to wear for Halloween. That way they get to wear a number of different costumes in one year if we happen to go to more than one Halloween event! Don't forget to check Goodwill for costume props and accessories. That's where we got my husband's awesome cheerleading outfit! I may even have one to match!! Happy Trick-or-Treating!
Linking at: Tatertots & Jello
Friday, June 6, 2014
Romantic Tutu Skirt
Summer is here, but life hasn't slowed down yet. This week is dance recital week. That means extra class on Monday. Dress rehearsal on Thursday from 9:15 am to 8:00 pm. Dance recital performances on Friday night, Saturday afternoon, and Saturday evening. Followed by the after party! Busy week!
Not to mention that one of my daughters started summer school this week too. I'm very proud of her for choosing to attend and improve her school work. She's worked so hard to get A-B honor roll this last semester. Summer school will help her to keep improving her skills and hopefully not drop for next year. It's been great so far. Too bad school isn't always like this. They do projects and hands on activities and the best part, NO homework!
Before school was out, my oldest had a school project on an influential person in history. Being a dancer, she chose Anna Pavlova, the famous ballerina. She had to write a report, dress as the person, recite a speech, and create a visual aid. She already owned tights, a leotard, and ballet shoes. We just needed a tutu skirt, specifically a longer romantic style tutu. Most tutorials are for the fluffy kind, so we had to figure out our own and make sure it was pretty simple as well.
First you will need soft tulle fabric in the color of your choice. Measure your waist. Multiply this number by three and this will be your measurement for the material width. The length should be at least past your knee. I bought six yards of my pink tulle. I cut the material in half width-wise (for the length) and used three yards for the waist. I ended up with four layers of material. Fold each layer in half with right sides together and sew up the side leaving 6-8 inches open at the top. Layer all the pieces on top of each other, matching them up. Run a basting stitch along the top edge, making sure to catch all four layers.
Pin a piece of 1" ribbon around the top edge of your skirt, making sure to keep your gathering even. Your ribbon tails will be hanging on either side of the opening in the back. There should be enough ribbon on each side to be able to tie on.
First you will need soft tulle fabric in the color of your choice. Measure your waist. Multiply this number by three and this will be your measurement for the material width. The length should be at least past your knee. I bought six yards of my pink tulle. I cut the material in half width-wise (for the length) and used three yards for the waist. I ended up with four layers of material. Fold each layer in half with right sides together and sew up the side leaving 6-8 inches open at the top. Layer all the pieces on top of each other, matching them up. Run a basting stitch along the top edge, making sure to catch all four layers.
Pull one piece of your thread, gathering your material until it is the right width to fit around your waist.
Pin a piece of 1" ribbon around the top edge of your skirt, making sure to keep your gathering even. Your ribbon tails will be hanging on either side of the opening in the back. There should be enough ribbon on each side to be able to tie on.
Sew the ribbon to your layers of tulle. I stitched a seam towards the top of the ribbon, as well as a seam towards the bottom of the ribbon. This will help the ribbon lay flatter and will guarantee that all the layers are sewn on.
Step into the skirt and tie on. An easy, beautiful skirt for your ballerina. Great for dance or play time.
Tuesday, October 29, 2013
Peacock Tutu Costume
It seems like we have a peacock theme going on in our house right now. I'm sure all the work we've done designing Big Sis' bedroom in peacock décor, influenced Little Sis to want to be a Peacock for Halloween. There were some peacock costumes and accessories out there, but costumes can be so expensive! Some of the accessories were even more than the costume itself. Even peacock feathers can be expensive. So I was looking for a way to create the peacock look, but on a budget!
We have a pretty good supply of old dance costumes from all the years the girls have participated in dance recitals. Those suckers are expensive too! Any time we can reuse an old costume is a way to get a little more bang for the buck out of them. Luckily, we happened to have a teal ballet costume that was the perfect base for a peacock costume. It just needed a bit more to complete the look. If you don't have a teal costume, you could always wear a blue leotard or even t-shirt and shorts.
You will start by cutting a piece of skinny elastic that fits around your child's waist. You can either safety pin the ends together or tie them together. I used a combination of dark blue, teal, and purple tulle to create my tutu. Cut your tulle into long strips. The width of the material is probably a good size depending on how tall your child is. Alternating colors, tie your strips of tulle onto your elastic on to the back half of your circle of elastic. The pieces should reach down to around your child's calves. This will be your peacock tail.
For the front of your tutu, you will cut your pieces much shorter. Continue alternating your colors and tie these shorter pieces around the front half of your elastic. Make your tutu as full as you want, tying strips until you are happy with it. Remember your elastic will stretch some and may leave some empty spaces if you do not have enough strips.
Monday, August 19, 2013
Organizing your Flip Flops
My hubby thinks that I am obsessed with flip flops. Looking at these pictures, I can see where he might get that, but I do have to defend myself. We live in Florida. Flip flops are pretty much the only thing I wear besides running shoes, even in winter! I may own one or two pairs of closed toe shoes (besides boots that is), I'd have to check on that. I'm not even sure because they are only worn during winter. So in my defense, I've gotten great deals on ALL my flops and I wear them daily. However, even flip flops start taking up space in the closet when you have quite a few of them. I needed a better way to organize my flip flops when I wasn't wearing them.
Luckily, many of the flip flops I buy come with these little hangers that are used to display them. Even the cheap, rubber flops at Old Navy come on their own little hanger. The hangers may not work if you have a large bar for your clothes, but they are perfect for the wire closet organizers. I have a little area in the corner of wasted space where clothes are too long to hang, but it is perfect to fit my flip flops on their hangers.
Even if you don't have the wire closet organizers, you can still use these handy little hangers. Hang a few pairs of flip flops on a plastic hanger and then hang it in your closet. Hanging your flops keeps them from getting flattened by other shoes on the bottom of your closet, especially if you have the cute ones with the jewels on them. You can also see which flops you have, making it easier to pick the perfect pair. In my opinion, you just can't have too many cute flip flops!
Wednesday, March 27, 2013
Baby Scarf Onesie or Jacket
I can't keep up with this crazy weather we are having here in Florida. One day it's 80 degrees and the next we have a cold freeze. Or we may wake up with weather in the 40's and by the afternoon it's gone up 40 degrees. I can't complain too much since we don't have snow to shovel, but add in some rain and high allergy warnings and it sure can make you crazy.
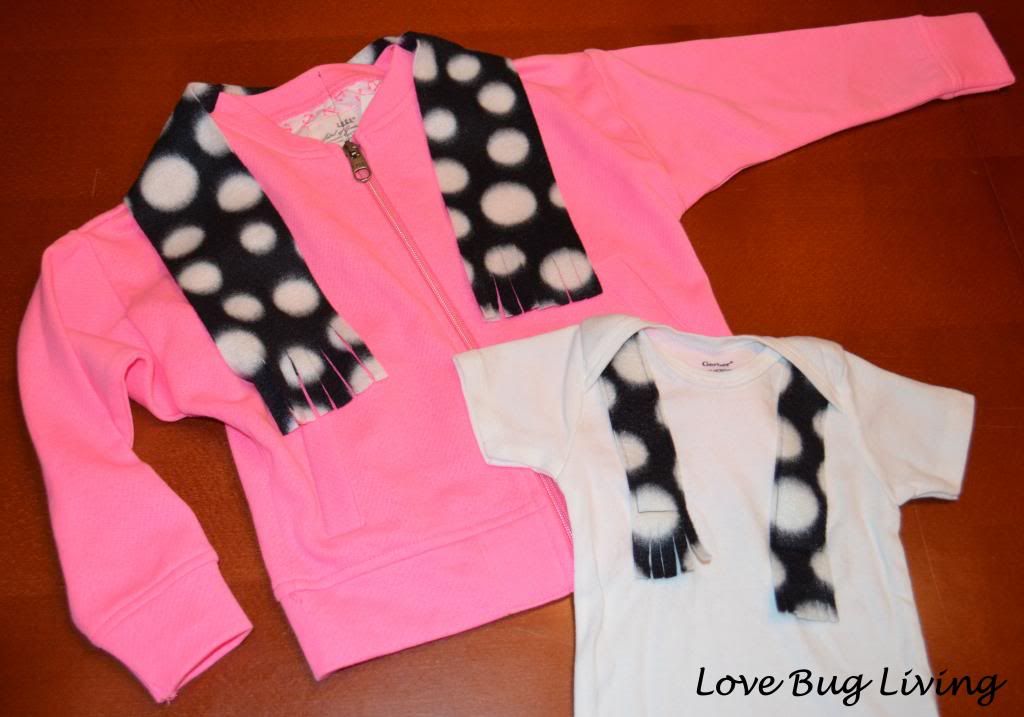
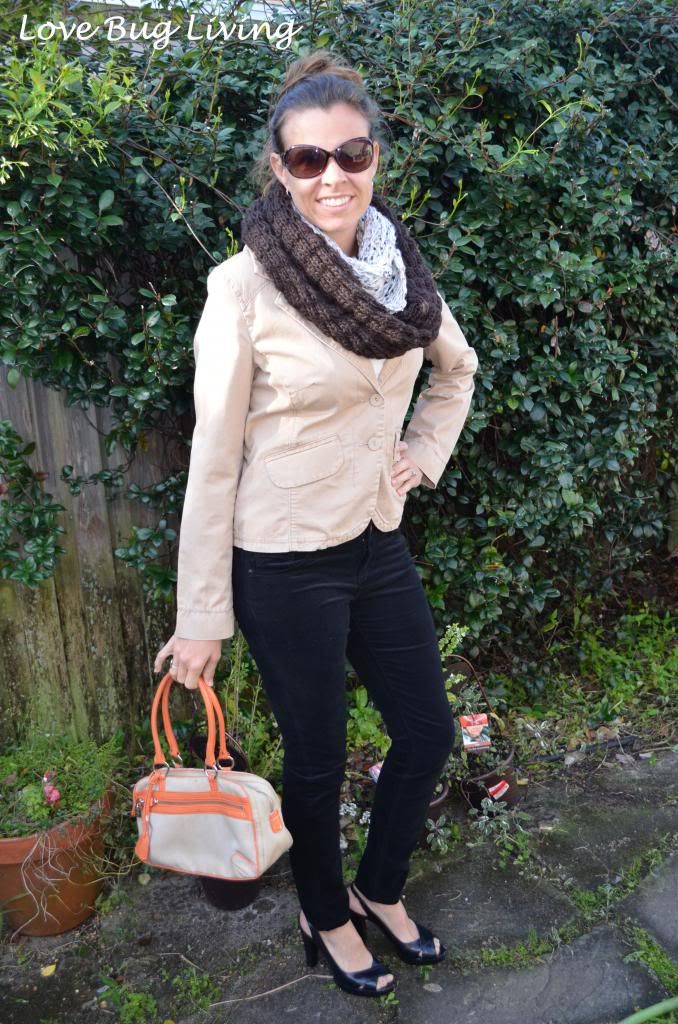
While we still have some cold weather, I thought I'd embellish a few tops for the little ones. I love my scarves. They are such a fun accessory to add to almost any outfit. While they may be great for you and I to wear, they aren't always so easy for our little ones. They can be a choking hazard or they might just get left on the ground somewhere. Now you can keep those little fashionistas in style without all the extra trouble. Make them their own Scarf Onesie or Jacket!
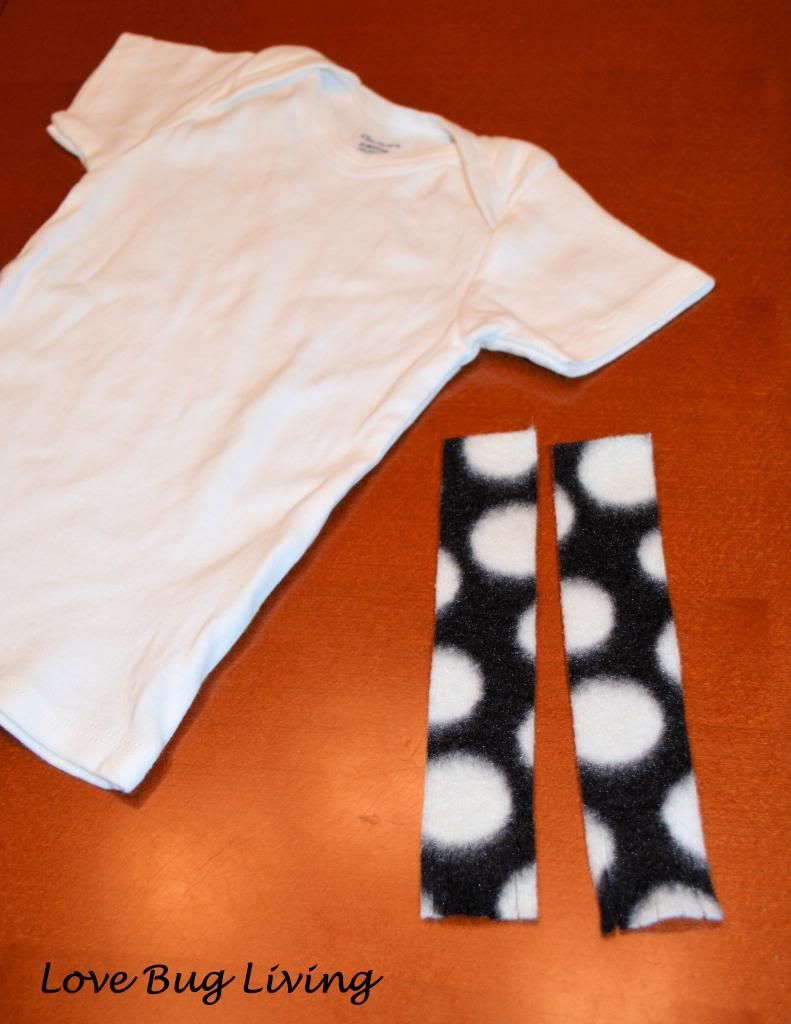
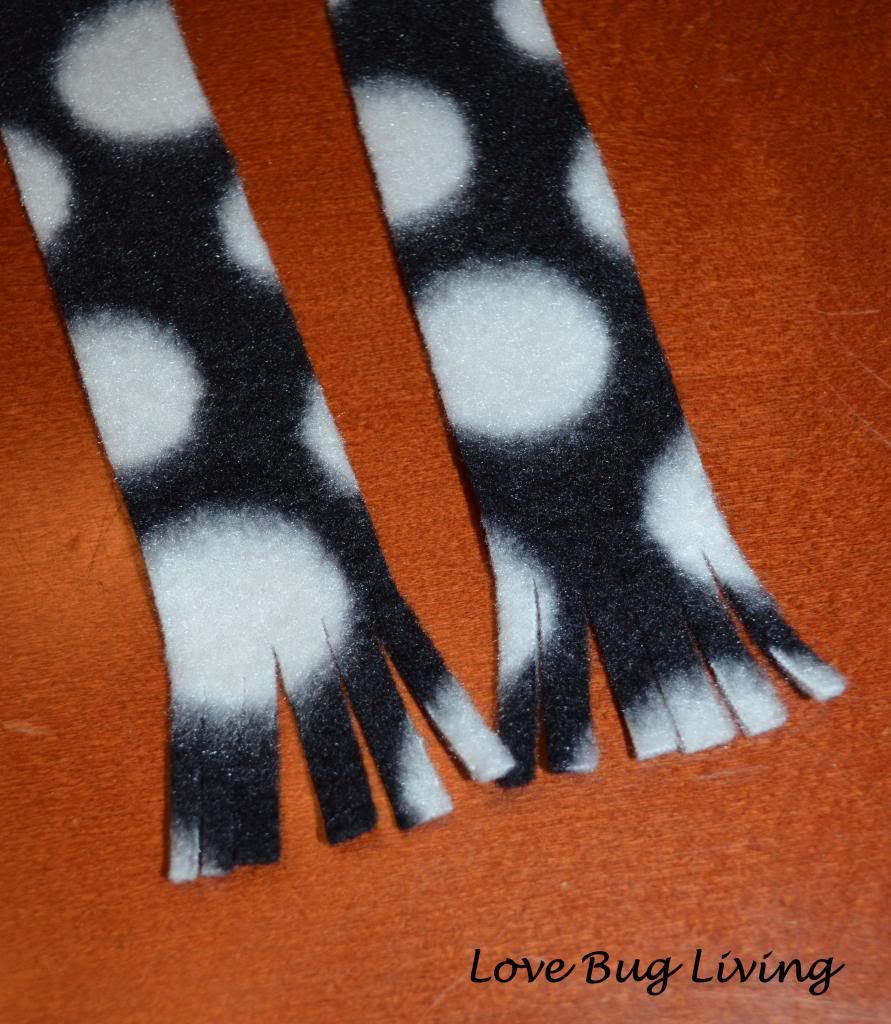
Choose a onesie, T-shirt, a long sleeve top, or even a jacket to add your scarf to. If you are embellishing a onesie or baby T, you will need two pieces of fleece that coordinates with your shirt. My fleece scarf strips were about 1 1/2 inches wide. The length will depend on what size onesie you are using and how long you want your scarf to be.
You will want to cut small slits into one end of each of your scarf strips to give it fringe. The nice thing about fleece is that it doesn't fray.
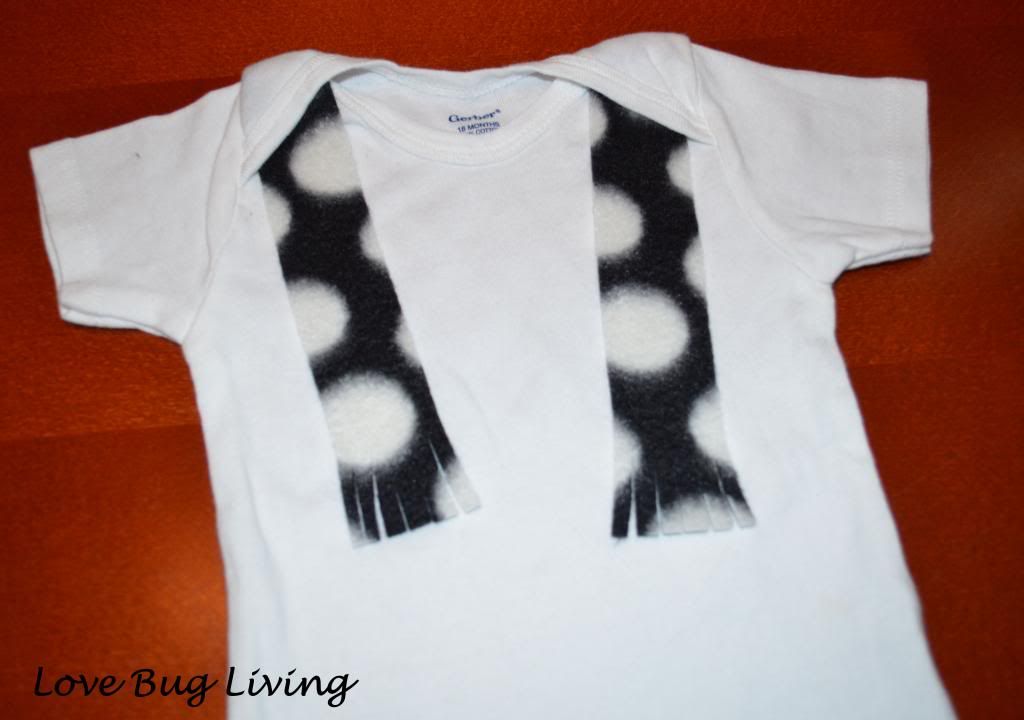
Slip the scarf strips into the slits on the top of the onesie. Pin in place and sew around the edge of the scarf strips. Sew across the strip above the fringe.
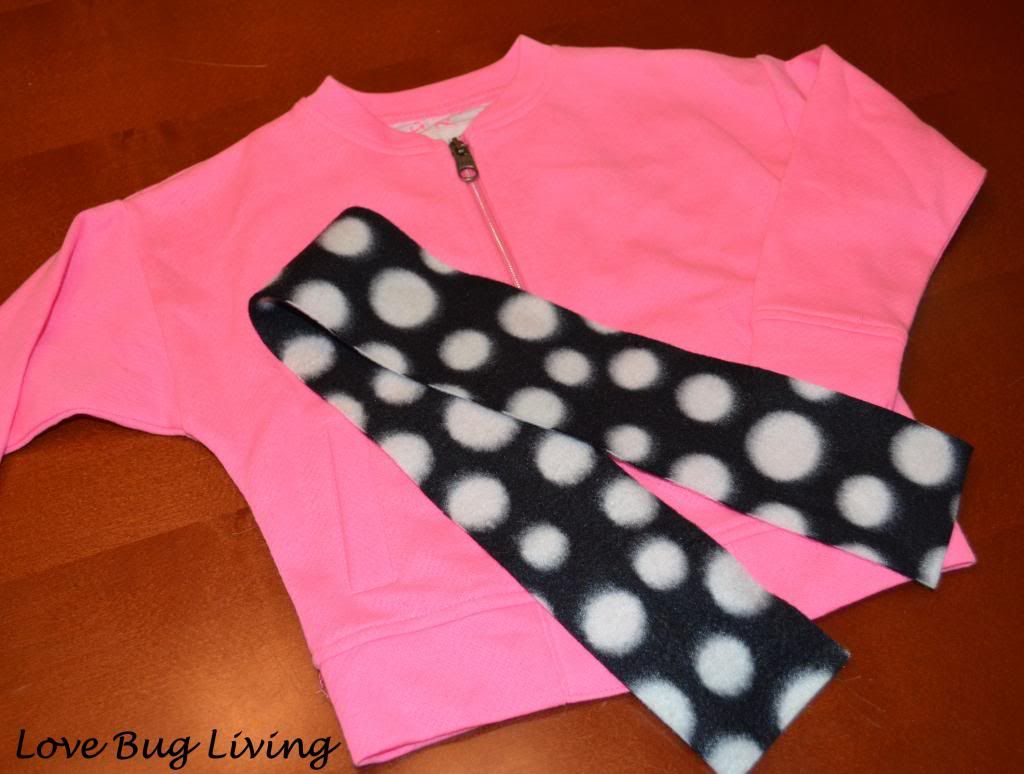
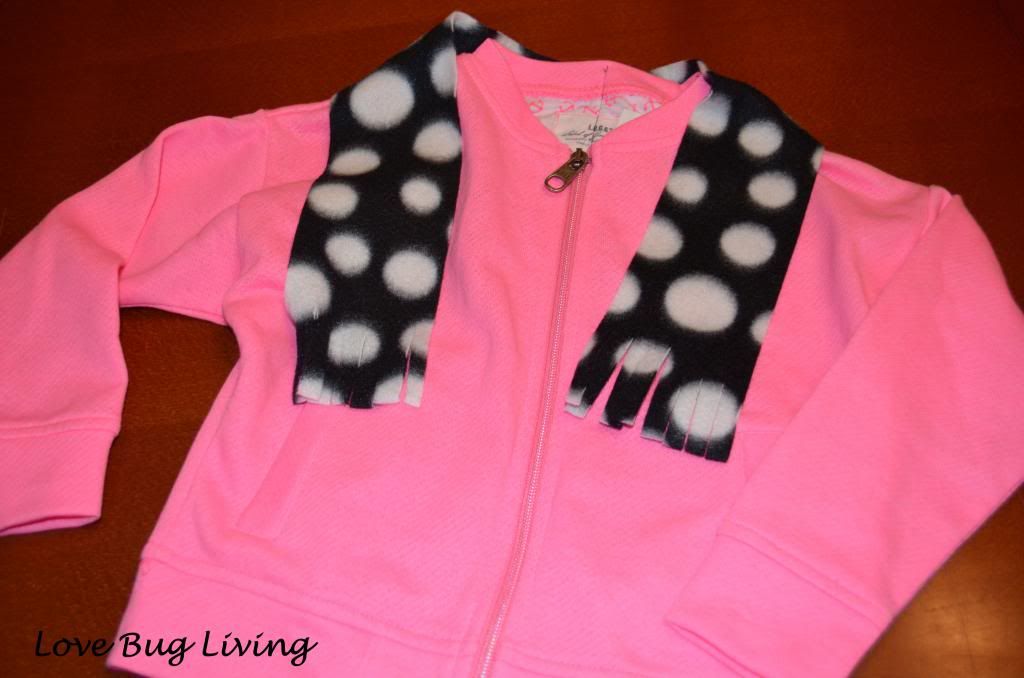
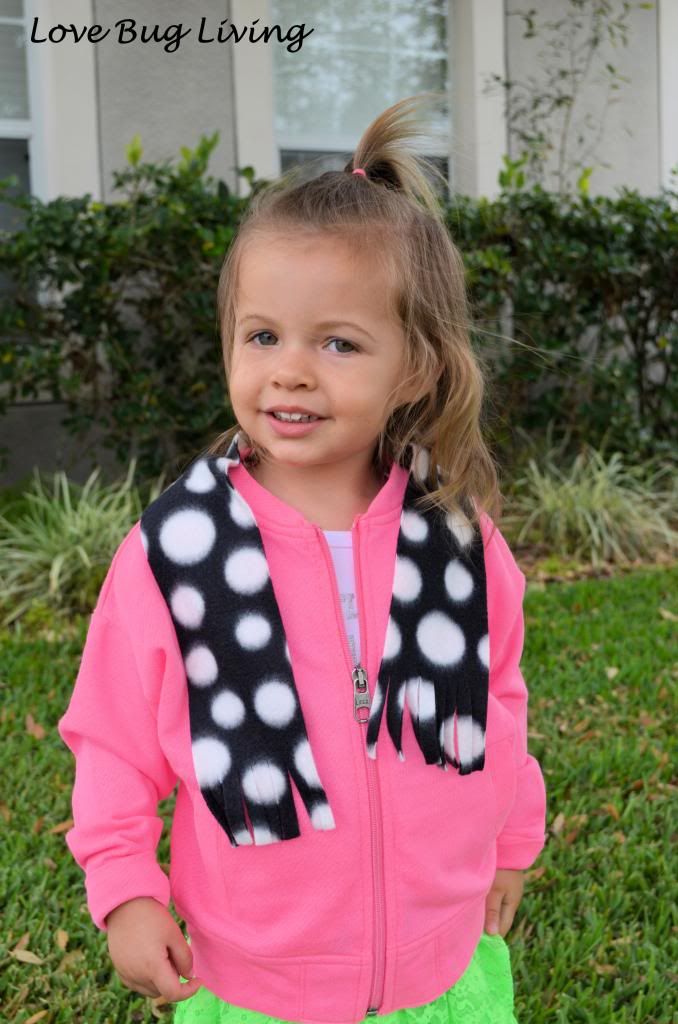
If you are using a jacket, you may want to use a long single piece of fleece for your scarf. This will give the jacket the look of a cute scarf, but no worry of losing it.
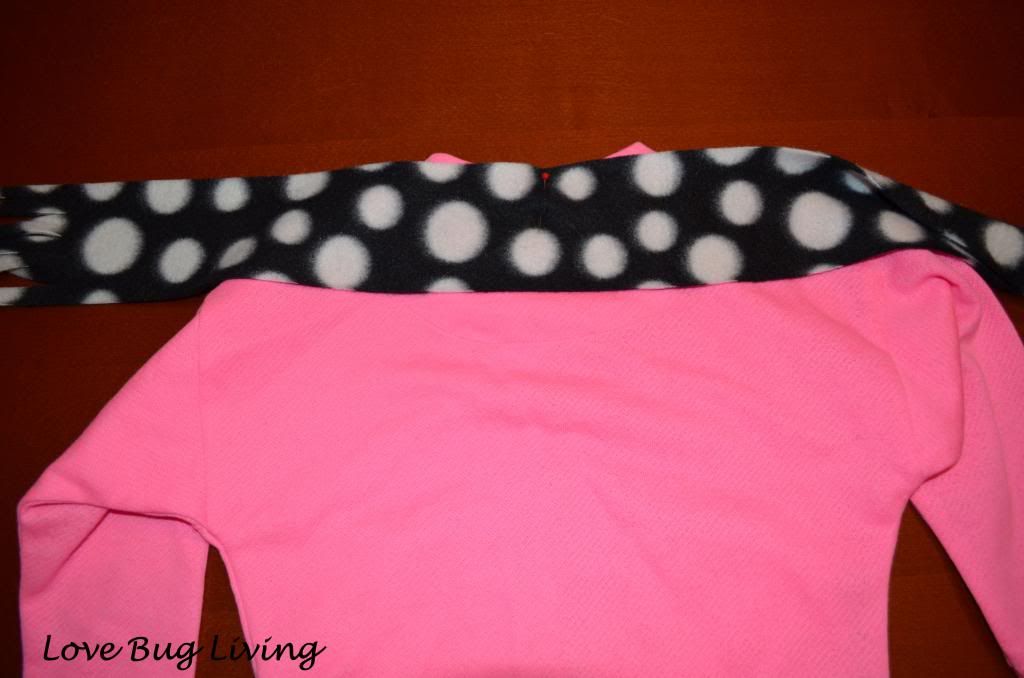
Start by fringing both ends of your scarf piece. Find the middle of your scarf and pin it in place on the back middle neck of your jacket. Sew a seam down the back of the scarf piece, attaching it in place to the back of the jacket.
Wrap the ends of the scarf to the front of your jacket. Tack the pieces in place to the shoulder seams. The front pieces of your scarf will still be able to move, giving it a more realistic look.
Whether you are making a Scarf Onesie or a Scarf Jacket, your little one will now be ready to head out in style!
Wednesday, March 20, 2013
Copy Cat Closet
It's time for this week's edition of Copy Cat Closet challenge by Ma Nouvelle Mode and The Grant Life. The inspiration look was so cute and comfy looking. I knew just how I wanted to create my version of the look.
Inspiration Look |
I created my outfit from my yoga pants and tunic. I thought this would be a great way to transform workout wear into a look I could wear to run errands. After class, just add a fun scarf and some boots and no one will know you were just in yoga class. A much more fashionable way to pick up milk on your way home.
Tunic - Academy Sports, Leggings - Reebok, Boots - Target, Scarf - Old Navy
Want to take the Copy Cat Closet Challenge? Head on over to Ma Nouvelle Mode and sign up for the weekly inspiration e-mails!
Wednesday, March 13, 2013
Copy Cat Closet - Pinterest Outfit
This week's Copy Cat Closet challenge by Ma Nouvelle Mode and The Grant Life was inspired by a look on Pinterest. I knew I had just the outfit as soon as I saw it. I like when I have the pieces for a look that I like, especially when it's is styled differently than I've ever worn them. Always good to have new inspiration!
Inspiration Look |
This was such an easy look for me to put together. I had just bought these pants on my last shopping trip (for around $2.50!!). The blazer was one I had bought long ago. You can't see it, but my jacket has a hoodie on it, so it is a bit more casual, which is more my style. I didn't have any nude slingback heels, so I went with black. Then I doubled up on the scarves. I mixed a dark and light scarf, just for fun. This is a comfortable, easy outfit that I would definitely wear.
Jacket - Mossimo for Target, Pants - Jeans by Buffalo, Dark cowl Scarf - Old Navy, Light scarf - Dillard's, Sunglasses - Elle, Heels - Gianni Bini, Purse - BCBGirls
Want to join along and share your Copy Cat Closet? Head on over to Ma Nouvelle Mode to subscribe to her weekly inspiration!
Subscribe to:
Posts (Atom)