Showing posts with label accessories. Show all posts

Sunday, November 8, 2015

Monogram Tote Bags


My weekends have been all wedding, wedding, wedding lately.  The big day is next Friday for my sister-in-law.  In honor of the upcoming day, I thought I'd share some of the things we've had going on.  A few weekends ago we headed out to the beach to celebrate the Brides in a little get together and fun filled night.  All of the Brides and Bridesmaids stayed at our condo, so I wanted to have a little something for each of the girls in a little gift tote filled with things they might need for our bachelorette beach weekend.


I wanted to personalize the totes for each of the girls.  I bought these 13.5 x 13.5 tote bags in a 3 pack set at Michaels.  Always a good idea to use your 40% off coupon!  I bought white totes for the brides and black totes for all of the bridesmaids.


I found my letter templates online Here and printed them out.  Next, cut out the letters.  Iron a piece of wonder under big enough to fit your letter onto your chosen fabric.  Trace your letter, backwards, onto the back of your wonder under and cut it out.  This should make your letter face the right way after you cut it out.  


Now it's time to place your fabric letter with the wonder under onto your tote bag.  Iron it in place according to the directions on your wonder under.


Sew in place around the outside of your letter with a zig zag stitch.  This really secures the letter in place.  


You can pick either a complimentary color or a contrasting color for the zig zag stitch thread.  


For our bachelorette bags, I filled them with things I thought we might need out at the beach.  The brides got white flip flops and the bridesmaids got a tan color.  Everyone got an extra large plastic solo cup and a towel.  Of course we needed some snacks and gum!


The beach weekend was a great time!  So much fun hanging out at the beach, great time at dinner and more fun checking out New Smyrna beach night life!  These tote bags would be great for any party favor and could be done with smaller totes.  You could also make them for Halloween treat bags with Halloween fabric for the monogram.  How about a child's dance bag?  Travel toy bag?  Reusable gift bag?  So many versatile ideas.  Make yours in no time today!


Wednesday, April 29, 2015

Monogram Jewelry Bowl


I'm so glad that I'm able to actually share these photos with you!  I was afraid that tons of pictures were lost forever when my SD card went bad and I couldn't get it to read.  While I'm sure I lost some photos, crisis was averted with ZAR data recovery software!  It took most of a day, but I was able to access most of my photos and save them to my computer.  Many of the photos were projects I had done as gifts.  All of which had already been given away, so no new photos could be taken unless I remade all of the items.  A big sigh of relief when I saw my photos come up!  Phew!  Lesson Learned: Save your photos to your computer right after taking them!!


Today I wanted to share with you a simple Mother's Day gift to make for any jewelry lover!  Make your own Monogram Jewelry Bowl!  I found these colorful little bowls in the housewares section at Target.  Just my luck, they were on sale!  Next I searched my scrapbooking supplies for some letter stickers.  I used single letters, but you could also use three stickers to make your initial monogram.  Simply stick your letter in place in the middle of the bowl.  Mine stuck pretty well, but you could also add a layer of Mod Podge over the top to make sure it stays in place.


These little Monogram Jewelry Bowls are great to keep jewelry on your dresser, in the bathroom, or by the kitchen sink.  They are a little catch all bowl to keep your jewelry safe when you're not wearing it.  A simple little gift that Mom will love.  You could even give it to her with a little jewelry surprise already inside!


Friday, June 6, 2014

Romantic Tutu Skirt


Summer is here, but life hasn't slowed down yet. This week is dance recital week. That means extra class on Monday. Dress rehearsal on Thursday from 9:15 am to 8:00 pm. Dance recital performances on Friday night, Saturday afternoon, and Saturday evening. Followed by the after party!  Busy week!

Not to mention that one of my daughters started summer school this week too.  I'm very proud of her for choosing to attend and improve her school work. She's worked so hard to get A-B honor roll this last semester. Summer school will help her to keep improving her skills and hopefully not drop for next year. It's been great so far. Too bad school isn't always like this. They do projects and hands on activities and the best part, NO homework!

Before school was out, my oldest had a school project on an influential person in history. Being a dancer, she chose Anna Pavlova, the famous ballerina. She had to write a report, dress as the person, recite a speech, and create a visual aid. She already owned tights, a leotard, and ballet shoes.  We just needed a tutu skirt, specifically a longer romantic style tutu.  Most tutorials are for the fluffy kind, so we had to figure out our own and make sure it was pretty simple as well. 


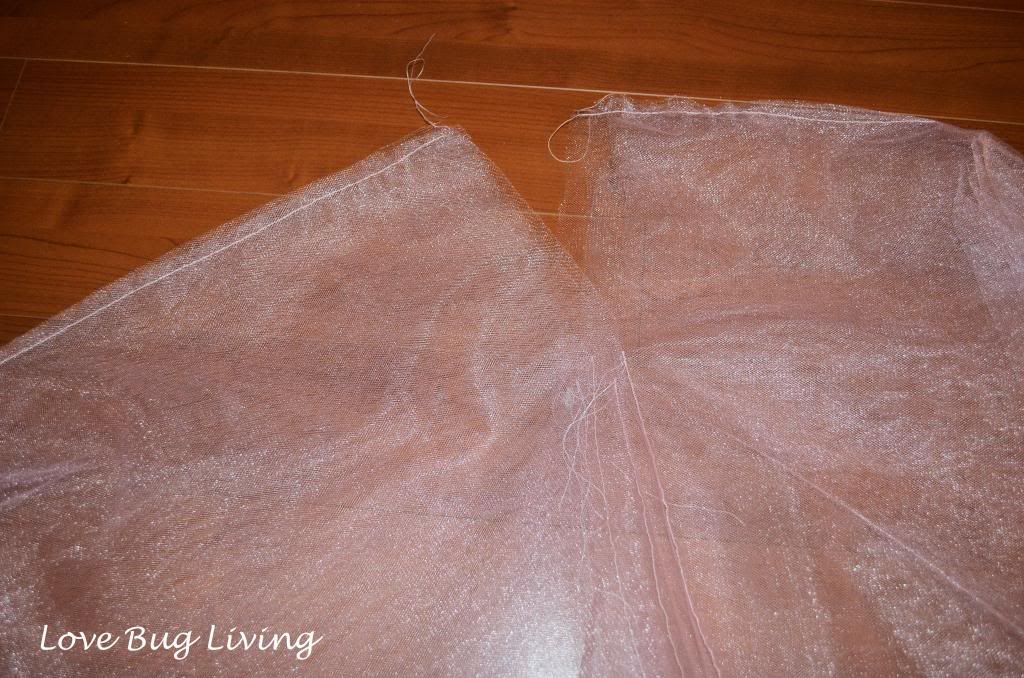
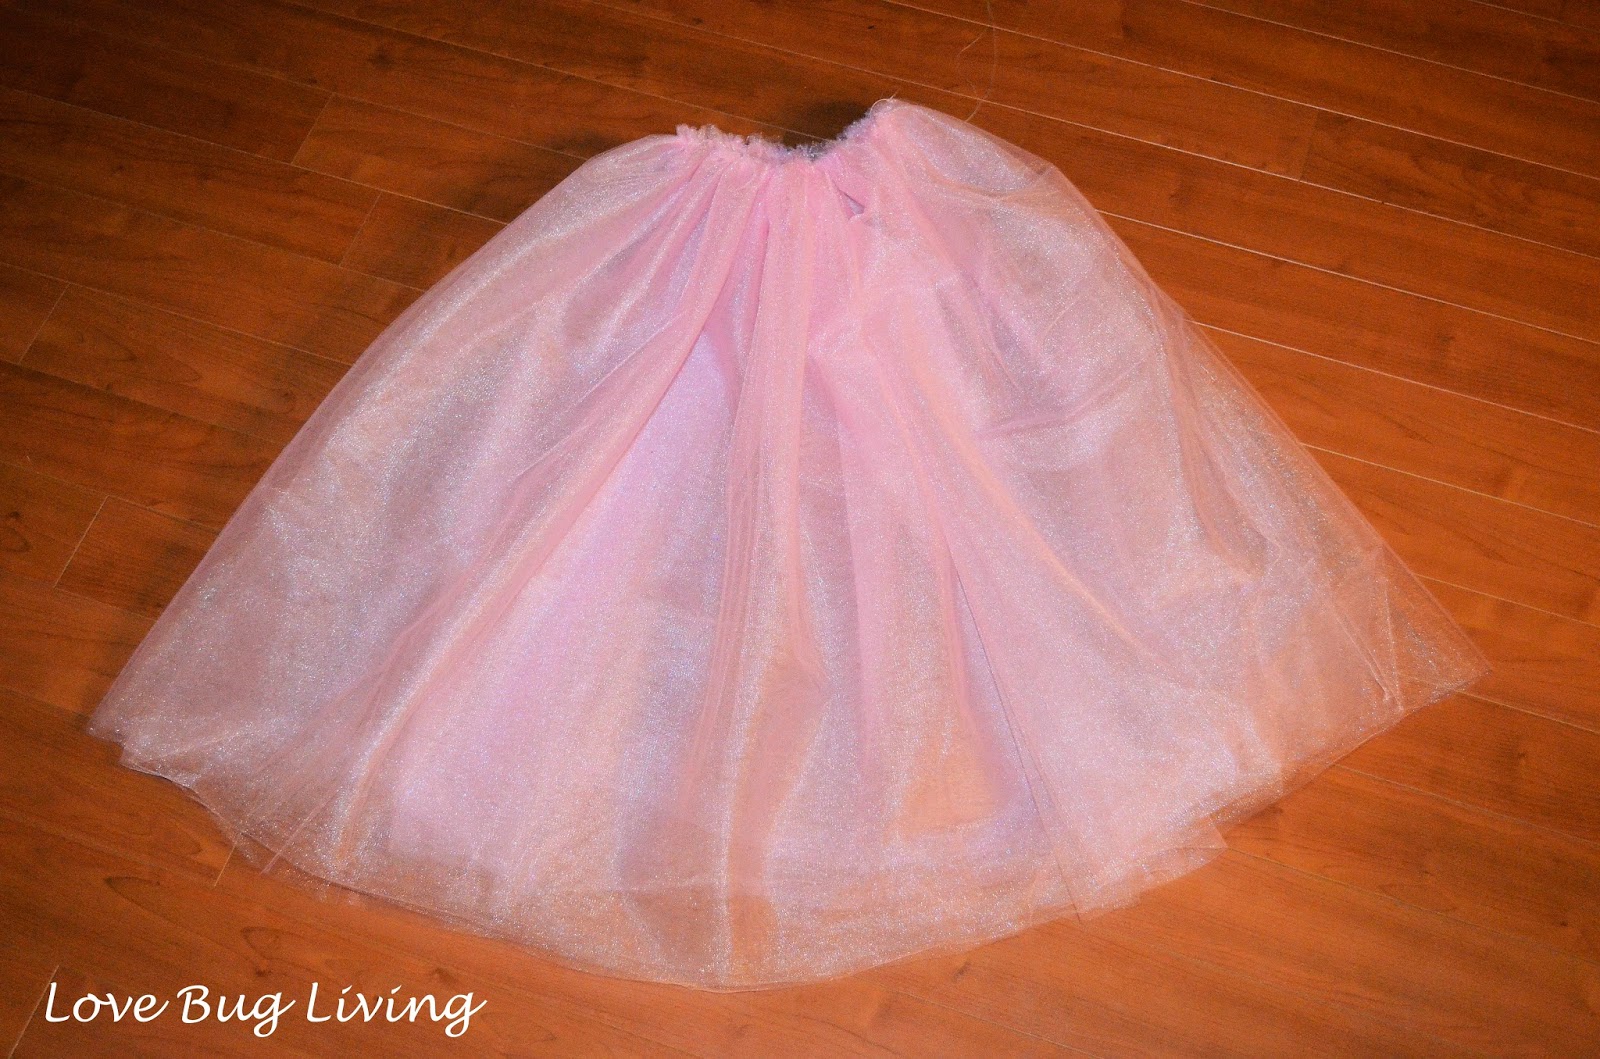
First you will need soft tulle fabric in the color of your choice.  Measure your waist.  Multiply this number by three and this will be your measurement for the material width.  The length should be at least past your knee.  I bought six yards of my pink tulle.  I cut the material in half width-wise (for the length) and used three yards for the waist.  I ended up with four layers of material.  Fold each layer in half with right sides together and sew up the side leaving 6-8 inches open at the top.  Layer all the pieces on top of each other, matching them up.  Run a basting stitch along the top edge, making sure to catch all four layers.


Pull one piece of your thread, gathering your material until it is the right width to fit around your waist. 


Pin a piece of 1" ribbon around the top edge of your skirt, making sure to keep your gathering even.  Your ribbon tails will be hanging on either side of the opening in the back.  There should be enough ribbon on each side to be able to tie on. 

 
Sew the ribbon to your layers of tulle.  I stitched a seam towards the top of the ribbon, as well as a seam towards the bottom of the ribbon.  This will help the ribbon lay flatter and will guarantee that all the layers are sewn on.

 
Step into the skirt and tie on.  An easy, beautiful skirt for your ballerina.  Great for dance or play time.  


Thursday, March 27, 2014

Uncluttering your Closet for Spring


I've recently been inspired by a friend on Facebook.  She has been working on decluttering her house by filling a bag a day for 40 days!  While I know I don't have the time or dedication to work on this for 40 days straight, I'm sure I could fill 40 bags of clutter!  Whenever I start feeling the effects of stress on my life, the clutter around me is what gets to me first.  When I haven't gotten enough sleep, it's the clutter that frustrates me the most.  Clutter collects all around us.  It comes in the form of toys, kitchen gadgets, decorative items, and even clothes.

While there are many areas that I need to declutter, I've started by uncluttering my closet.  I'm hoping to make my life a bit simpler and maybe make it easier to find something to wear.  I don't really have a large chunk of time to dedicate emptying out my closet and going through it all at once, so I am doing it a section at a time.  That way the task seems a little bit less daunting.  You can work on this whenever you have a bit of extra time.  It also might help to recruit the help of an honest friend.  Some friends may trade their services for a glass of wine! 

It's now time to start the purge!  I work on a section at a time.  Start with dresses or shoes or wherever you can make the biggest impact.  You are going to be making a few piles: Keep, Maybe, Toss, and Donate.  Torn, badly stained, and damaged items should go in the toss pile.  Items that are still useful to someone, even if it's not you, can go in the donate pile.  The maybe pile is for the items you can't rule out just yet.  The keep pile is for your definites.

When critiquing your clothing, be honest.  This is where your honest friend will come in handy.  The first round will be the easiest.  First pull out all of the items that you can't believe you still have and the items in poor condition.  Next decide which items are out of style, don't fit your style or you know you just won't wear anymore.  It will feel good to get these items out of the way.  Now it's time to try on everything you have left.  Do these items still fit?  Are they flattering?  Is it still your style?  Do you feel good when you wear it?  It can be tough to toss certain items, but ask yourself what is the reason you are really holding on to it?  Go through your dresses, pants, tops, and coats.  Don't stop there.  Don't forget your bags, shoes, belts, and jewelry.  Accessories can get cluttered just like everything else. 

Once you've finished your piles, it's time to put them where they need to go.  The toss pile is easy.  The donation pile can be split even more.  Have any items that are still in style and have value?  These items may be able to be brought to a consignment store and sold, earning you a portion of the sale.  There may be a number of consignment stores in your area.  Check with the store or website for their terms.  You will also need to find out what type of items they accept and how their process works.  Another option is consignment sales.  I've participated in one called Just Between Friends, that happens twice a year.  This sale is mostly for children's clothes and items.  I've had great luck selling items that I don't need anymore and at better prices than a garage sale.  Although, a garage sale is another great option if you are uncluttering your whole house.

Have any designer items that are 10 or more years old?  You might be better to take these to a vintage store.  These type of stores have become very popular and you will probably get a better price for these type items at a specialty store.

Now, how about the rest of it?  I hate to throw out anything that might be useful to someone else.  Drives me crazy!  I've picked up items people have put in the trash, just to donate it.  Just seems so wasteful to me.  There are many options for you to donate your leftover items.  You many know  friends or family that would love to get your hand me downs.  I've received bags of kids clothes from friends and it's always like Christmas in our house going through the items to see what we can use.  If you don't know anyone personally, you might check with your church to see if they are collecting donations for anyone.  I have donated old school uniforms to my girls' school that they pass on to students that need them.  Also check in to local homeless or women's shelters to see if they are accepting items.  Warm clothing items and maybe even blankets might be needed here.  Have formal or semi-formal dresses or even a wedding dress to donate?  There are organizations such as Donate my Dress that accept donations and give them to girls who could not otherwise afford them.  You can always donate to Goodwill or Salvation Army, but there are also many smaller charities that are happy to accept your donations.


After removing your toss and donation piles, you will be left with a maybe pile.  Now is the time to be critical.  Have you worn this item in the last 6 months?  Is it something you need?  Will you actually wear it?  Does it fit correctly?  After trying them on, move them to the keep or donate pile.  Now it's time to get everything back into your closet.  Organization is the key!  I put my clothes in my closet by category.  Shirts are all in together starting with my sleeveless, light colors to dark.  Then short sleeved tops, light to dark and finally long sleeved.  Organizing by style and color will make them easier to find when you need them.  I do the same with my dresses and pants.  I've even labeled my jeans by style, so it's easier to find the right pair.  Fold sweaters and knit dresses to keep them from stretching.  I also fold my sweatshirts, t-shirts, shorts, lounge wear, and any other items that I'm not worried about wrinkling.


Organizing your shoes and accessories is just as important.  Clear plastic shoe boxes are a great way to store your shoes and are easy to stack.  You can always add a picture of the shoes on the side of the box for easy reference.  Living in Florida, I wear mostly flip flops.  I use a small hanging section of unused space as flip flop storage.  The white closet racks are perfect for this.  I have a few purses, and not as much space to keep them.  I now keep them on a top shelf in a clear plastic bin, but I have a booklet of pictures of them to reference what I have.  Sounds kind of crazy, but it does help me find the perfect purse for my outfit. 


I've also created a Hanging Scarf Organizer to keep my scarves accessible.  This also hangs in my closet, keeping the clutter out of sight.  I have an awesome full length mirror that opens to reveal a jewelry cabinet.  It is a great way to store lots of jewelry and keep it from tangling.  Other options would be a jewelry hanger that has tons of pouches for each item.  They can be hung in your closet to keep the clutter to a minimum.  If you have extra drawer space, you can also use jewelry trays to get organized. 

This whole process could take you a weekend or it could take you weeks, but you will truly feel lighter and more accomplished when you are done.  Donating and helping others may be just enough to make it worth it.  I know I feel better every time I get rid of something that I just don't need. 


Tuesday, October 29, 2013

Peacock Tutu Costume


It seems like we have a peacock theme going on in our house right now.  I'm sure all the work we've done designing Big Sis' bedroom in peacock décor, influenced Little Sis to want to be a Peacock for Halloween.  There were some peacock costumes and accessories out there, but costumes can be so expensive!  Some of the accessories were even more than the costume itself.  Even peacock feathers can be expensive.  So I was looking for a way to create the peacock look, but on a budget!

We have a pretty good supply of old dance costumes from all the years the girls have participated in dance recitals.  Those suckers are expensive too!  Any time we can reuse an old costume is a way to get a little more bang for the buck out of them.  Luckily, we happened to have a teal ballet costume that was the perfect base for a peacock costume.  It just needed a bit more to complete the look.  If you don't have a teal costume, you could always wear a blue leotard or even t-shirt and shorts.


You will start by cutting a piece of skinny elastic that fits around your child's waist.  You can either safety pin the ends together or tie them together.  I used a combination of dark blue, teal, and purple tulle to create my tutu.  Cut your tulle into long strips.  The width of the material is probably a good size depending on how tall your child is.  Alternating colors, tie your strips of tulle onto your elastic on to the back half of your circle of elastic.  The pieces should reach down to around your child's calves.  This will be your peacock tail. 


For the front of your tutu, you will cut your pieces much shorter.  Continue alternating your colors and tie these shorter pieces around the front half of your elastic.  Make your tutu as full as you want, tying strips until you are happy with it.  Remember your elastic will stretch some and may leave some empty spaces if you do not have enough strips. 

 
Your peacock tail tutu is now ready to show its feathers!  Need another accessory?  Simply glue a peacock feather or two to a headband and your child will be ready to trick-or-treat! 


Wednesday, May 8, 2013

Embroidered Felt Bookmark Teacher's Gift


If your kids are in school, you probably know that this is Teacher Appreciation Week.  I'm always trying to think of cute and easy gift ideas to make that teacher's may actually use.  I usually do a little gift during this week and look for something bigger for the end of the year.  The class typically puts together a gift basket from the whole class, but it is nice to have something little for my daughters to present themselves along with their homemade cards.  This year we decided to make our favorite teachers embroidered felt bookmarks!


If you are good at that kind of thing, you can hand embroider whatever design you would like.  I decided to take advantage of my sewing machine's under used specialty stitch feature and machine embroidered our teachers' names.  I really want to find more uses for these specialty stitches.  They can be so much fun!


I then cut out the embroidered section with pinking shears to give it a more decorative look.  I cut out a second piece of felt that was slightly larger than the first piece in a contrasting color.


I slipped in a folded piece of matching ribbon to one end of my bookmark and pinned it in place.  Finally I stitched around the edge of my smaller felt piece, sewing the two pieces together and securing the ribbon in place.  Your embroidered felt bookmark is ready to hold your place.  These felt bookmarks are great for package toppers or as party favors.  Show your favorite teacher just how much you appreciate her with this Embroidered Felt Bookmark!


Monday, October 29, 2012

Pocket Tissue Holder


My daughter's teacher just celebrated a birthday.  The room mom sent out a note letting everyone know that she was planning a spa themed gift.  All of the kids could bring in a pampering type item to give the teacher.  We put together a little canvas bag with a relaxing candle, moisturizing lotion, bath gel, and a little sponge.  I wanted to make something else little to go with the gift.  I'm sure with all the little germs in the class, that there will be the occasional cold.  So I decided to make a cute tissue holder for those pocket tissue packs.


You will need two rectangular pieces of fabric measuring 7" x 6.5".  I went with two coordinating prints.


Pin your two pieces of fabric with right sides together.  Sew around the edges with a 1/4" seam allowance.  Leave about 1.5" opening.  Turn the pieces right sides out through the opening.


Press your fabric, making sure your corners are turned all the way out.  Fold the two short ends towards the center.  The fabric that will be on the inside should be the one on the outside.  Your pieces should meet in the middle or just overlap.  Pin in place.


Sew down the two short edges with a 1/4" seam allowance.  Now turn your tissue holder right sides out.


Now your pocket tissue holder is ready for some tissues.  Just slide them in.


These little tissue holders are super easy and quick to make.  They are great for gifts, stocking stuffers, or even party favors.  Plus they are so much cuter than a plain old pack of tissues.